

The Super Champion
Trying to find information about the Super Competition isn’t so easy; in fact, a few bike enthusiasts on some forums even dispute it ever existed. Well, here is proof that Motobecane did make this model, albeit infrequently, through the 1970’s. I don’t believe the Super Champion was ever exported to the U.S., and even in France they seem quite a rare find. Unlike the Team Champion, Motobecane’s celebrated top model and star of their brochures both in Europe and America, the Super Champion is a bit of an enigma. Perhaps you could even say that it’s a bike that has slipped under the radar of many vintage bike websites and forums. This does make it a genuine rarity.

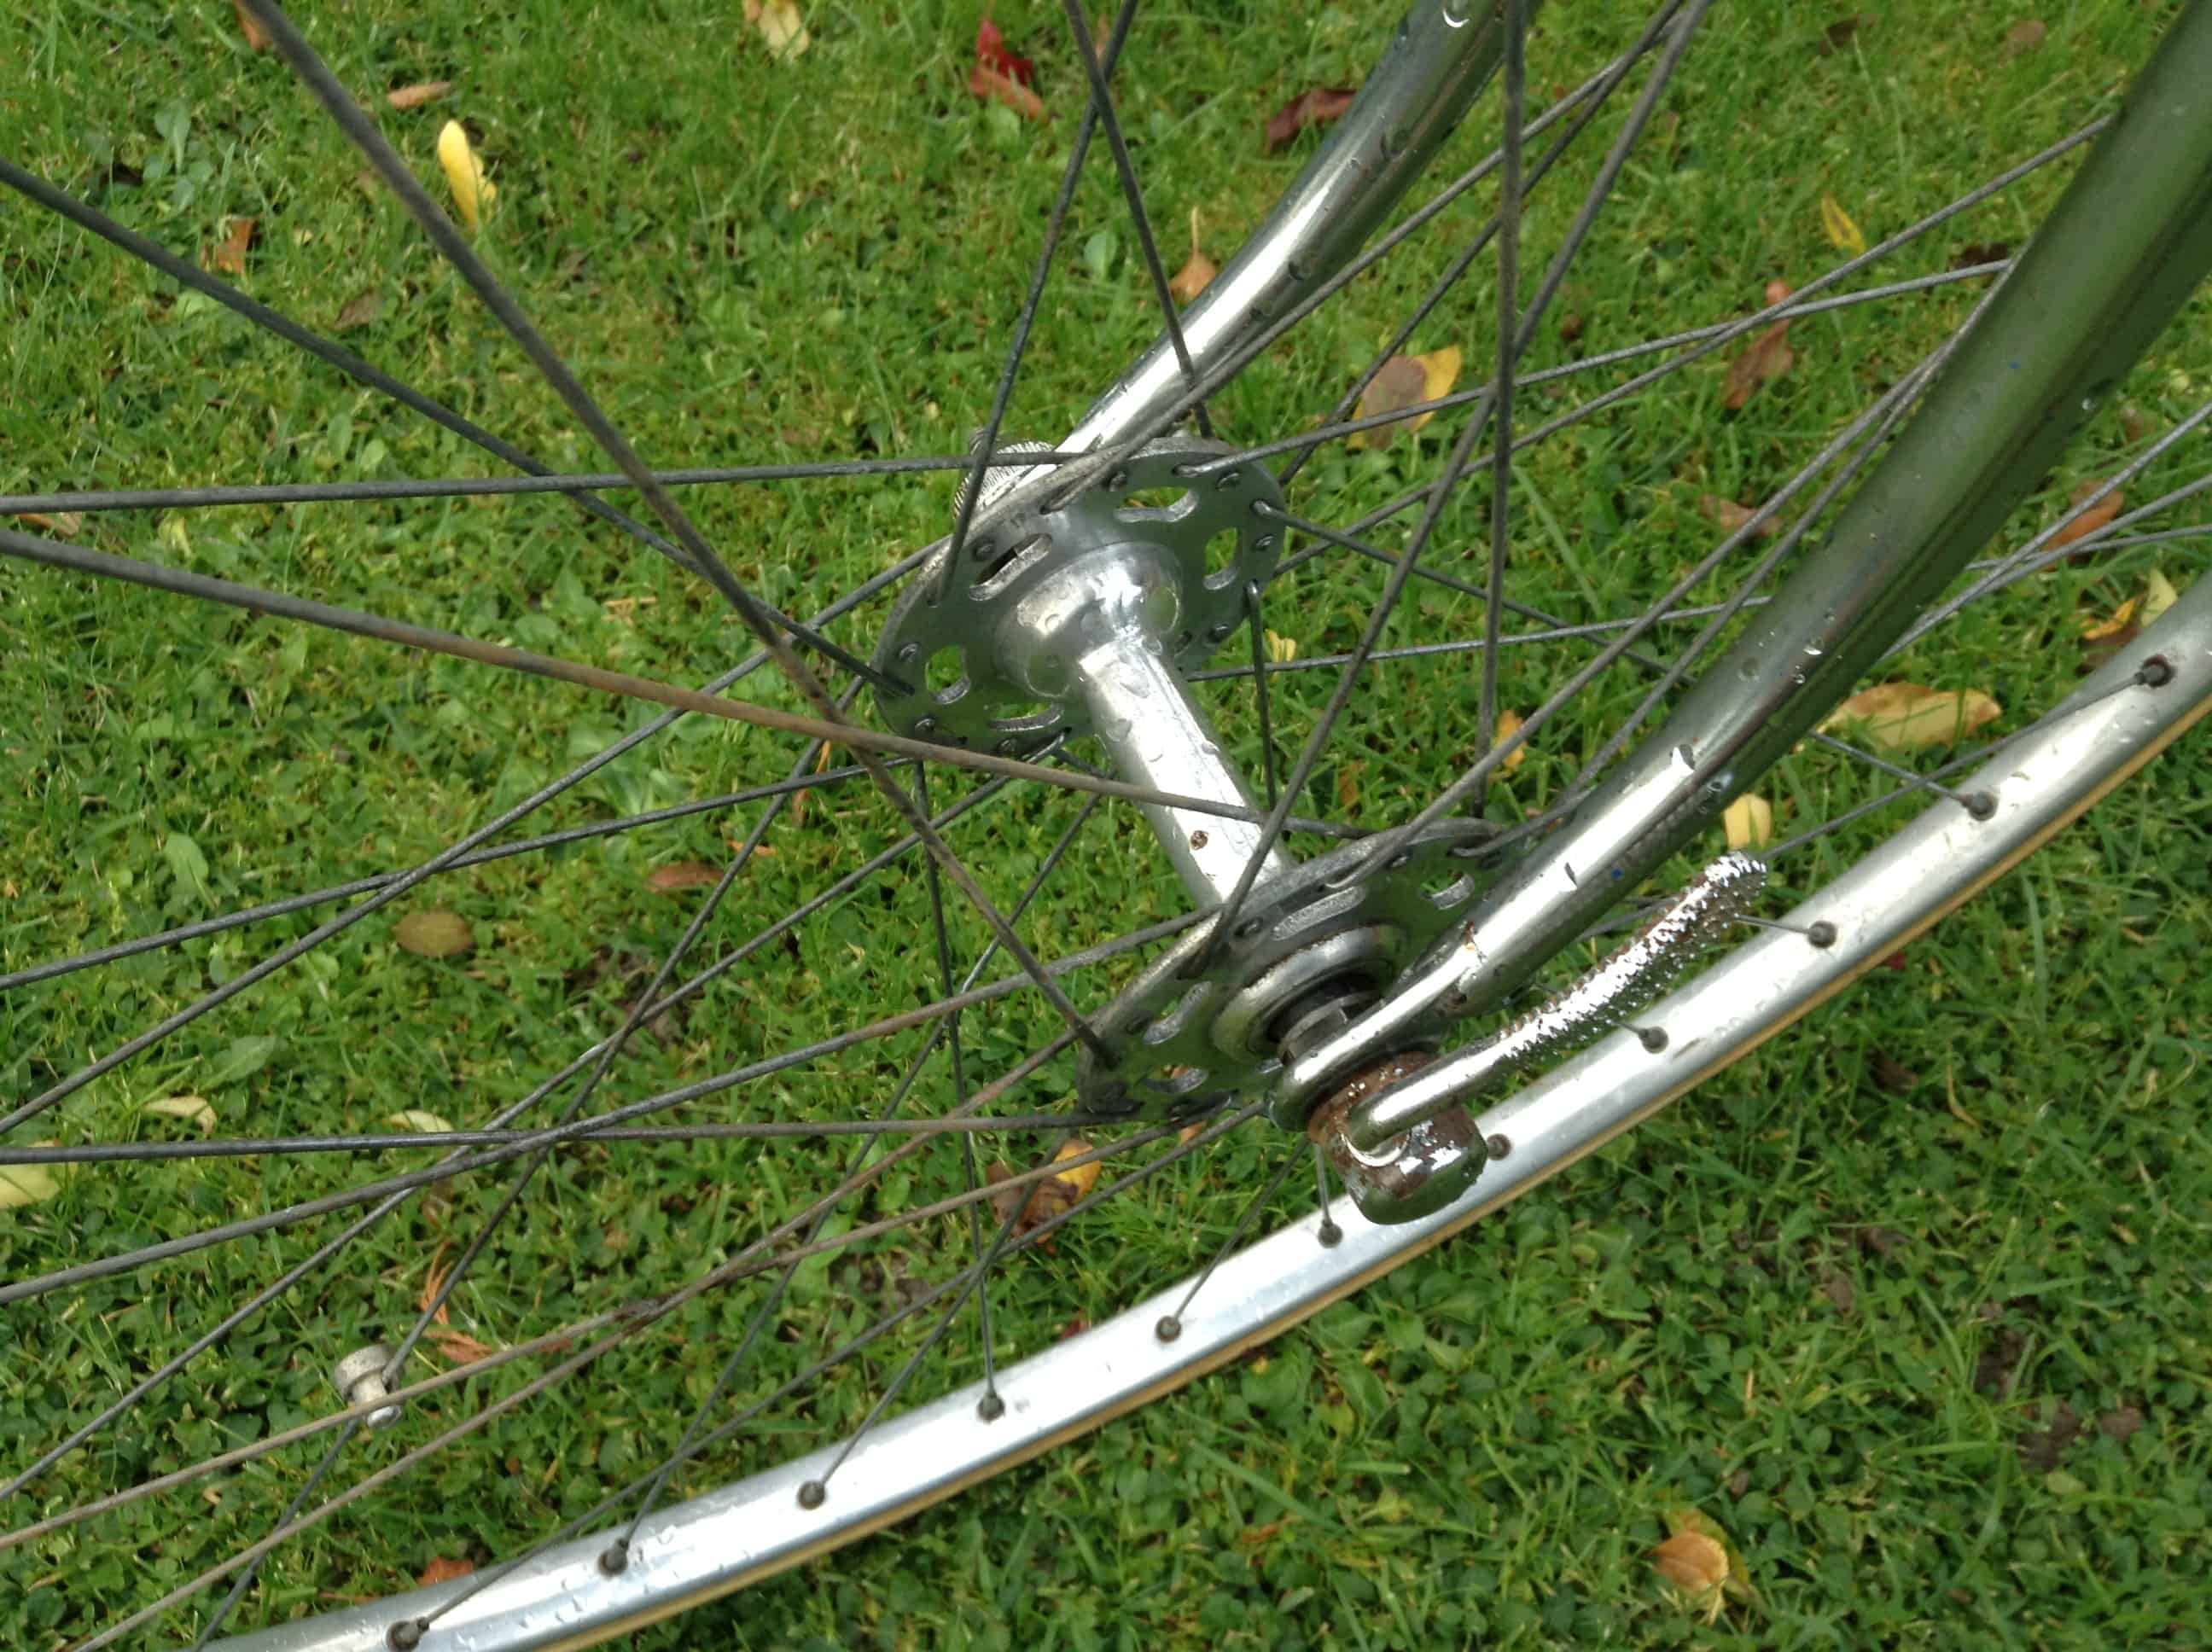
Rear Hub Condition
It Really Did Need a Clean
When I bought this bike, I wasn’t given any information regarding its history and when it was built. However, pedals and hubs can be a good source for dating French bikes as Normandy and Atom often used a 4 figure date stamp on their components. The Atom 440 pedals date the bike to 1975, and I’m sure these pedals are original. Here is a rare British catalogue from an importer with the specifications of the Super Champion for 1975. If you’d had walked into this particular bike shop in the year when Bjorn Borg first won Wimbledon ( 1975 ), you’d have paid 115 quid for one of these bikes. I am told that’s worth £674 in today’s money, which is like buying a new Specialized Allez E5 Sport. However, I just can’t imagine a Specialized Allez being around in 40 years time, especially surviving the years of dirt and grime, the years of abandonment, that this bike had endured.

Tubular Woes
Where to Start..?
As I’ve mentioned before, my first impulse when restoring a bike is to remove the crankset. This allows you to get access to the whole frame, as well as the bottom bracket, and a perhaps it’s also because..well..a dirty crankset just looks awful. Even under a layer of grime and dust, it was striking how beautiful this frameset was, its ruby red colour was still something to behold. With its decals still intact, its 531 badge proudly sitting on the seat tube, its chrome still offering some shine, I could see great potential here for restoring this frame. However, shamefully, the owner of this bike had managed to get blue speckled paint all over these tubes, from the tips of the rear drop outs right across the bike to its fork ends. Quel dommage, as they say in France.

Blue Paint on the Tubes
Removing Speckled Paint
The problem with removing anything like paint or glue from steel bike tubes is the real danger of scratching the original paintwork. At the least, it is likely that by removing something nasty from the surface, you’ll compromise the finish of the tubes. At worst, you can just end up adding swirls of abrasions and even remove the top layer of the paint itself. I have often used super fine steel wool for restoring paint, but I don’t really like the way this material breaks up into tiny pieces and ends up everywhere. So instead, I went to my local DIY store and bought a fine course pad with angles, which helps gets into nooks and crannies. It seems to be made of plastic, and feels less abrasive than steel wool. As well as that I also bought a cork abraser, which is the softest of all.

The Pad Removing Blue Paint

Cork
Tangled Up in Blue
Using the cork help to clean the surface of the paint, but it couldn’t remove the blue speckled paint. For this, I used the softest part of the pad and was very careful not to be abrasive and begin with the lightest pressure. It’s a good idea to soak the paint in WD40 while constantly cleaning with soapy water to see the effect of every use of the pad. The water and lubricant add a protective layer to the surface which helps prevent scraping on the bare metal. It wasn’t long before a liquescent blue appeared as the unwanted paint was broken down. It was crucial that no red should appear on the pad, which would be a sure sign othat the original paint was being removed too. Thankfully, there was no scouring and no removal of the original colour.

Blue Paint Removal
What Polish?
Although I avoided removing the luscious original red paint of this lovely frameset, its inevitable, upon removing the blue specks, that the glossy layer of lacquer would be affected, even if some of it was already lost to time. There’s not much you can do about that in this situation, it’s just a compromise you must take to improve the tubes. After multiple soapy washes and a rinse, 95% of the blue specks had been removed, but the paint needed a polish to revitalise it again. I imagine this frame looked amazing when it was new, and I wanted to get it back to something like it was back in 1975. I have a basic Halford’s car polish I’ve often used on frames, and it works pretty well, especially as it only costs about £3.50. AutoGlym, Simoniz and such like will set you back £12, even £18 for the same size bottle, yet car magazine reviews give the Halford’s polish a 4 star rating and state that it works just as well as the spendy brands. The specialised bike polish by Muc-Off is also 5 times more expensive, and for me, its just not worth the money. The Halford’s polish really made a difference.

Rim Specks
The Condition of the Wheels
The blue specks were everywhere, even on the rims, tyres and hubs of the original Normandy wheels. What on earth had this person been doing? Spray painting furniture, a motorbike, in his garage? On top of this, the wheels were in a pretty bad state. Caked in a layer of hardened dirt, the hubs looked lifeless; the rims looked like they were cast in ancient times, as the metal was so sullen. Spokes always seem to suffer the most, and they were difficult to restore. Some spokes had lost their outer plating, while others had a rough coat of brown rust. They needed a stiff brush to remove the years of neglect away, but nevertheless, they came back better than I expected. I think the Normandy hubs came back to life the best, those high flange beauties are a joy to behold when polished up.
How it Turned Out – Video and Pictures
I think the colour is quite special on this Super Champion, and after all the restoration and a good polish, it really came bike to life. I think the quality of the paintwork is a true measure of how well made a bike is, and the fact that this frame could come back after being abused shows its innate quality. Its the type of bike which makes you stand back and just admire its looks, the subtle fork crown designs, the proper badge on the head tube, the gold details around the lugs, the half chromed forks and simple and elegant decals. it may not have the build of a Team Champion or the ornate designs of its earlier versions, but it’s a damn pretty bike.
Pictures

Restored


Normandy Hub

Specs
- 1975 Motobecane Super Champion
- 58cm Centre to Top
- 58cm Top Tube Length C – C
- Reynolds 531 Main Tubes
- Cherry Red, Half Chrome Forks, Gold Details on Lugs
- Huret Dropouts, 120mm Rear Spacing
- Huret Challenger Transmission
- Pivo BTR Stem and Pivo Racing Handlebars
- Record 700c Tubular Rims
- Normandy High Flange Hubs
- Atom – Maillard 5 Speed Freewheel, 14 – 25
- Hutchinson Tubular Tyres 700 x 20
- Atom 440 Pedals, Afa Clips, Unknown Straps
- Weinmann Vanquier 610 Long Reach brake Calipers
- Weinmann Brake Levers
- Stronglight 49D Modele Depose Crankset
- Suede Italia Grand Prix Saddle
- Unknown Seat Post, 26.4mm
- Stronglight Bottom Bracket, 118mm Spindle
- Unbranded Headset, French Threaded
- Weight: 22 lbs
Job well done! This bike is gorgeous!!!
Thank you George, I appreciate your compliment. It’s one of my favourite restorations, and I just wish I could get out on it more in this terrible winter weather!
Congratulations Dominic on this article and fine restoration. Over a decade ago I found a lavender version of this model on web in Sydney and had it sent to Melbourne. Totally as per specs bar the saddle and has Clement tubs which are great to look at and hold air for 24 hours on a good day. Has the Universal 68s which differs from yours and it’s interesting that the company didn’t use a French product. The bike has been well used ,chips in paint and a little surface rust on frame. The Huret Challenger is quite a nice mechanism and was used in serious competition successfully I’ve read. There is a lovely example of the lavender job on the web presently. These as you say are rare model from a significant manufacturer and were Europe destined. The example I have was probably exUK or France.
Will leave mine original as possible and ride it hopefully.
Anyone else with one of these out there?
Best from OZ.
Thanks for your comment Steve, and very interesting to read about your lavender version of this bike, I’d never seen one before reading about yours. I think the colour is beautiful, but I imagine they are very rare so you’ve got something quite special there. Any pictures you could send? My address is: greenblck@hotmail.com
Best regards
Dominic
This is a beautiful bike! You’ve done a cracking job. I have one of these in a rather striking lime green. Did you ever have an estimated value for it, I’ve done extensive research only finding that it was quite a rare model but haven’t seen one for sale!
Thanks Tim, and as far as value I wouldn’t say it went for a high price, perhaps these mid range and rarer Motobecane models are worth no more than £250. I don’t think vintage road bikes are really valued in the UK, unlike they are in the United States. I remember selling bikes like the Peugeot UO-8 in Seattle for $250 without a struggle..
Hi Dominic,
Lovely bike!
Do you have any idea what Thread-Type the BB Typ is?
Br Michael
The bb thread was French, 35 x 1. Cheers!
Very fine work, and it shows; clearly worthwhile results.
Beautiful race bike.